
Bra Band Ouchie Fix, (or, 'How to keep your bra band from riding up to your armpits!') I wrote this section many years ago, but I've since then discovered the 'carnivore' way of eating and have lost a lot of weight, keeping it off for about a year and a half now, and improving health in so many ways. One day, during the weight loss journey, I realized that my bras no longer ride up, at all! But, it took me over 15 years to find a way to do that, and I don't expect everyone to change their whole way of eating just to keep their bra bands in place, so I'm leaving all these instructions below. This is what worked for me for ages.
Here's the story... bras were invented to keep breasts nicely compressed into a neat package, and the band designed to stay in place because our breasts were ATTACHED to our bodies so the bra band COULD NOT ride up beyond a certain point.
Here's where the logic of mastectomy bra designers sort of eludes me. While I realize that women who have had one breast removed DO still have a certain amount of control over where that bra band stays because of the other 'real' breast, how does anyone expect a bra band to stay in place on a flat chest with NOTHING grown to the body? After all, most of us wear breast forms that sit INSIDE the bra cup, inside a pocket, it's not glued to our body, right?
We (many of us, anyway) actually now measure a little smaller around up above the area where the bra band sits, so of course it's going to 'walk' upwards, even if you wear the widest bra bands available. Our body is now shaped a little like a cone or triangle, instead of an hourglass.
Once we wrap our minds around that, we can see that if you put an elastic belt on the middle of a flexible cone shape and wiggle the cone around, the elastic belt will slowly ride up to the smaller end of the cone. Get it? This is what's called the 'AHA' moment! Sit there quietly for a few seconds, make a mental picture, try not to curse out loud as this sinks in. Don't blame me, I'm just the messenger.
So...why are we sold a bra that can't possibly stay in place? Because it's a lot more cost effective for mastectomy bra makers to make one standard basic bra design (to fit women who have one breast left to hold down the bra band) than to further cater to women with both breasts removed who need to have something MORE done to hold that bra down.
They already make bras with two pockets only because they don't want to have to make individualized bras for the left mastectomy or right mastectomy, and we may as well feel lucky that it's there for us with double mastectomy, I suppose.
I can understand the reasoning somewhat, maybe, and the cost effectiveness of what they do, since it would be a headache to have to design any more options in all the various band and cup sizes and styles, but that doesn't make my bra band feel any better, does it for you?
Now that you know the 'why' of the problem, let's look at the solutions to the problem:
There are actually TWO solutions that I use now, and my 'sometimes' favorite one for summer is 'Bra Band Suspenders' below, then after it is a better solution that I wear year round. It's simple in theory... just sew a suspender clip to either end of a 3 inch piece of elastic and clip one to your bra band (usually just under the armpit side of the cup, but wherever you feel it riding up the most) and clip the other end to the top of your jeans, or skirt, or undies. Make one for either side of your bra to keep it in balance. You can bend, twist, stretch, and your bra will stay in place MUCH better! For people with single side mastectomy who also have this problem, you maybe can just wear one. Here's a photo of how a pair should look when you finish:
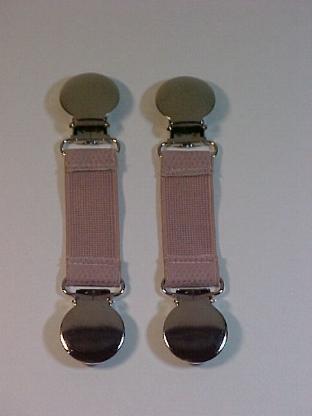
I looked all over, in local stores and on the web, usually spending around $5 or more for a package with just two clips ($10 for four, so I could make a pair!) and finding that most of the rectangular ones readily available wouldn't hold on all day. Finally, I found these round ones online that gripped well, but the original ones I found were too wide at the ring and I found wide elastic annoying.
Eventually, after much testing, I found that round ones that are about 7/8th's inch wide and have a ring for the elastic that's 3/4" wide, worked just right, if you can find them. If not, use any that you can find. When you look for these, they are sometimes called 'suspender clips' and sometimes called 'pacifier clips', depending on what people are buying them for. No one actually calles them 'bra band suspender clips' except for me, so don't bother asking. :^)
Bra strap elastic that's plush on one side, kept them feeling good, so look for that if you can find it. Regular elastic can pinch, I don't recommend it unless you can't find anything else. (You could actually make a soft flannel tube to cover your elastic if you can't find a softer elastic.)
Flesh color elastic is the best, because it doesn't show through your clothes like white or black elastic can. The silver color ends haven't been a problem for me, but if you worry they might show when wearing very thin light color fabrics, you may want to use a beige fingernail polish to paint the surface. So far, I've not had them show through anything so I've left mine plain.
When you sew your elastic onto the clips, be sure to put the plushest side so that it'll be next to your skin, and fold the ends of the elastic over to sew on the same side as the round smooth covers (away from your body). That may seem wrong to you, but you don't want the ends rubbing on your skin and no one will see them anyway. Your comfort comes first! Be sure to use a little 'Fray Check' (it's a clear glue sold at fabric stores) on the ends of the elastic after you stitch it down, so that it won't leave strings or fray. Plush elastic tends to eventually fray a bit if you don't... not much, but you should still do this step to prevent it happening.
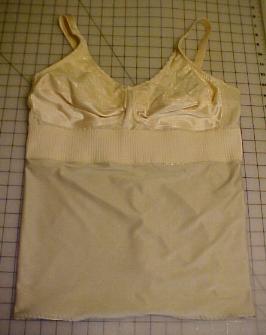
This is very simple to do and takes very little time or skill. You're going to add a 'tube top shape' onto the bottom of your bra that will extend down over your tummy and will hold on snugly, not allowing your bra band to ride up anymore! This will end up looking like one of those body-shaper things, but DO NOT EVER WEAR THOSE after mastectomy, they are positively NOT made for mastectomy use. They are made to squish breast fat into shape at the top section and now all it would do is squish your breast forms firmly into your scars, VERY painful, and potentially dangerous if it impedes the flow of lymphatic fluid, not worth the risk. (That's my warning, I'll get off my soapbox now.)
Go to your local fabric shop and ask to see the swimsuit fabric. It comes in a range of colors and is made of something called 'Lycra' or 'Spandex'. You probably won't find it at Walmart in the fabric section, you'll have to go to a place like Hancock's or JoAnn's or any other larger fabric store, or you can order it online.
Optimally, you probably should look for a color as close to your skin color as you can, but get whatever you like since it's not going to be seen. I often use beige, black, or white, same as my most often used bra colors. Be sure to get actual swimsuit fabric, not swimsuit lining, which also comes in beige but is a little too thin for this purpose.
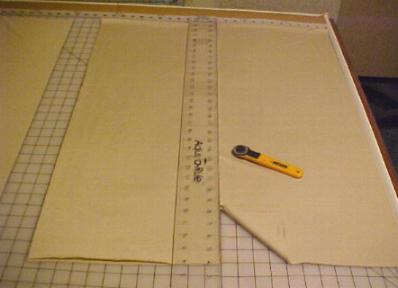
Swimsuit fabric is pretty expensive, so just get 1/3 yard (that's 12 inches, for those of you who don't know, lol...) The fabric comes off the bolt in widths of up to 60 inches, so you don't need to care about how wide it is at this point, the 12 inches should be enough to go from the bottom of your bra band down to below your waist. Swimsuit fabric stretches a LOT, so don't worry, it'll still stretch down and cover your abdomen when you put it on, even if you're very tall, like me. While you're at the fabric store, get a spool of a similar color Dual Duty Polyester thread.
PLEASE NOTE: In my photos below, I wanted my 'tube' to not only keep the bra band from riding up, I also wanted it to act as a waistline-shaper, so I cut TWO 12" sections from 60" wide fabric. The fabric yardage was folded in half on the table here, so after I cut it each piece with it doubled, I had to unfold the two separate sections and lay one over the other so that I'd still have a 'matte side' touching my skin to grip better and a 'shiny side' to the outside so that my clothes would skim over it better and not hang up on the matte side. I pinned them together all around the long edges. From here on, you're going to pretend the two layers are ONE layer. Just ignore all those pins on the long edges of the first few photos if you're using only one layer of fabric. Since this was photographed, I'm now almost always using a double layer ONLY on the front of my tube, as it doesn't feel constrictive, but it does still control my tummy somewhat. :^)
If you're thin and shapely (and I am SO jealous of you!), or for normal daily wear, just use one layer because all you need is for it to hold your bra band down. However, if you've got a muffin top, you'll positively revel in how good your shapeliest jeans suddenly look without that muffin top hanging over. :^) Just thought I'd mention it. I'd also like to mention that using two layers isn't as comfortable as one layer. Not nearly. Most of the time when I wear this sort of 'fix', it's with one layer or a double layer sewn onto only the front half of the tube. I reserve just a couple of bras with the two layers of stretch fabric for those days when my fat middle is just TOO bothersome!
Fold over your fabric so that the two short ends meet, then re-pin the short ends together. Remember, here it's shown with me already using two layers pinned together to make it thicker and more like a body-shaper, so in the photo at the right, I'm putting all the short ends on top of each other and ABOUT to pin them together but you see other pins near my fingers where I'd put two layers together earlier. If you're using only one layer, there won't already be pins in it before this point.

Sew the short ends of the fabric
rectangle together, so that you now have a tube. I recommend setting a
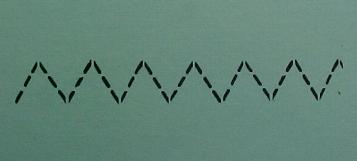
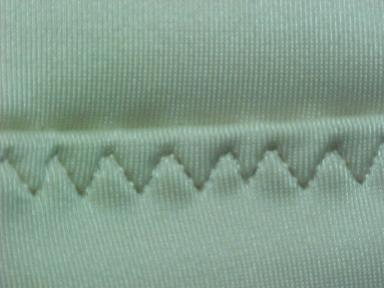
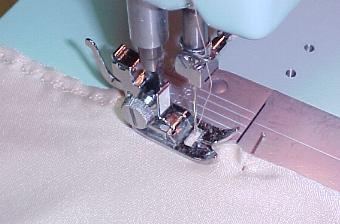
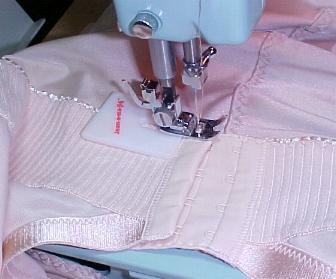
sewing machine at a stitch length of 12 stitches per inch and the widest zig-zag stitch. Set your machine to a 3-step stretch stitch as seen in the photo below. If your machine uses cams, the design on it will look like the photo, or you may have a dial to set it to this stitch. This lets your seam stretch with the fabric
more without breaking the threads. Almost all sewing machines with different stitches have a 3-step zig-zag built in, though you may have not realized it before. If your machine is older and doesn't have it, you can get by with standard zig-zag.
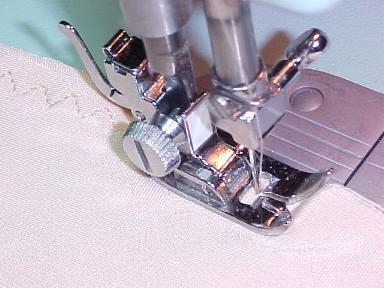
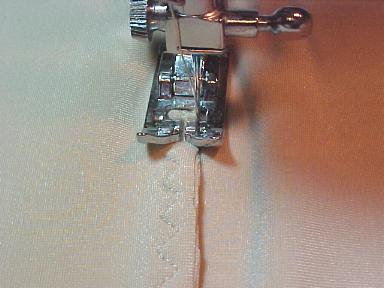
Stitch the short ends of the tube together. You may encounter crawling fabric, so lift your presser foot occasionally to get rid of any wrinkles that try to form. You might also just barely stretch the seam as you sew, to give it even more stretch when worn. I like to use a walking foot, but am using a basic zig-zag one here because most people have something similar to this one. A walking foot will help the fabric to not wrinkle and crawl around though, so if you have one, use it. :^)
Trim the seam. Stretch fabric crawls no matter how well you have it pinned, and you'll want to neaten it up.
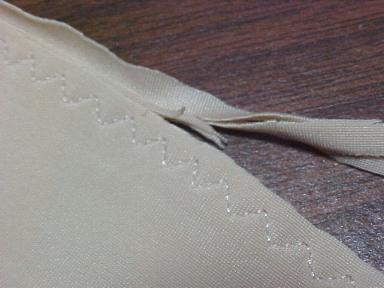
Open up the tube, lay the seam over to one side, and stitch down it again to make it lie flat.
This is how it'll look on the outside of the tube. Neat, huh?
You will hem your tube now. If using one layer, just fold it up once and stitch around it. If using two layers like I am here, first stitch the two layers together, then trim the edge, then turn it up and stitch it down by sewing over the previously stitched area.
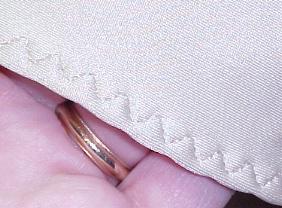
Here's how your hem will look on the outside.
Now we'll do the top edge that will later join your bra. Same as before, if using one layer, just fold the edge like a little half-inch hem and stitch around it. If using two layers, you can simply stitch them together, trim the edge, and it'll work to sew directly to your bra band.
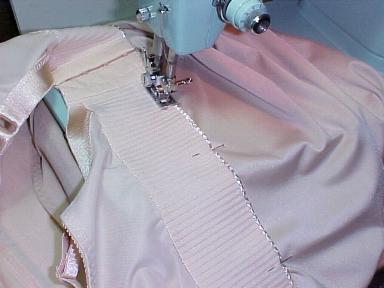
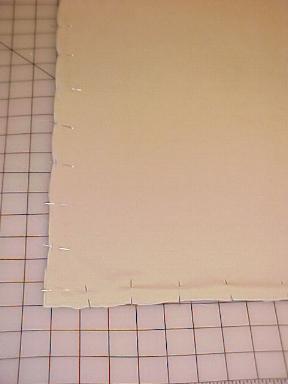
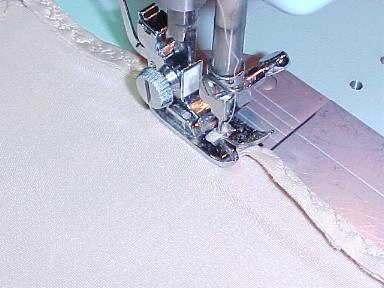
Now we're going to match your tube to the bottom of your bra band. Overlap the the bra band's lower edge over the upper edge of your tube , and stitch around it from the outside of your bra. Note: It helps if you have marked off your tube into fourths by putting a pin into the seam of the tube, then one directly across on the other side of the tube, then one halfway between them on either side.
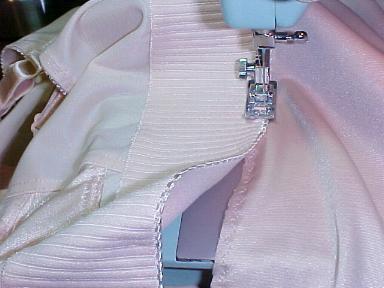
Do the same with your bra band, marking center back, center front, and halfway between each at the sides. This just makes sure the tube and bra band are matching up evenly, without stretching either one out of shape too much when you're sewing. Remember, you're only going to barely lay the bra band over the tube, just covering the 'upper hem' area of the tube with the bottom edge of the bra band, as seen at left. If you have a 'free arm' sewing machine, part of the tube can go under the sewing machine arm, as seen here. If your sewing machine bed is just one big flat surface, you can still do it, just go slower and try not to stretch it out of shape as you work it around.
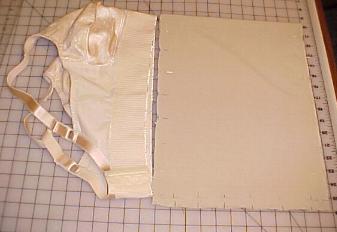
I prefer to hook the back of the bra at the middle set of hooks and stitch the tube closed across it. (Hook it wherever your bra best fits you without being too tight.) It's very thick when you get to the bra hook area, so I put a plastic Jean-A-Ma-Jig under the back of the presser foot to level it so that it'll sew easier when starting up on the thick part. If you don't have one, push a piece or two of cardboard back there. If you want to leave your hooked area adjustable, just don't sew the tube to it under the hook area at all, you can leave it unsewn there for a couple inches.
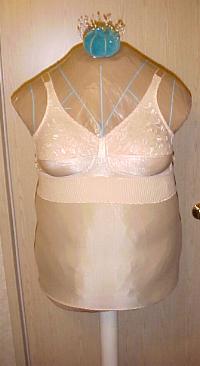
There you have it, a finished bra-tube that will keep your bra band OUT of your scars.
Bet you think I've
missed something here, right? Here's another 'AHA' moment for you.
:^) I'm smiling as I write this, because it was a real 'find' for me.
Did you know that from seam to seam, across the back of your bra, it
generally has elastic so that your bra band can stretch enough to let
you step into the 'neck' of your closed bra and pull your bra up by
the straps all the way up over your hips and keep pulling it up while sliding your arms in?
It's the same as what you do when you're putting on a one-piece swimsuit.
WAY easier and FASTER than putting your bra on backwards with your bra
cups weighed down with your silicone breast forms, hooking it together, then having your breast forms flop around on
your hips as you struggle and pull to get the bra turned around your
body, then fight it to get it up into place. You're welcome. :^)
Once you try this a time or two, you
will NEVER want to put on an open bra gain! My hips are WAY bigger
than my bra band size, (I mean WAAAY bigger, ahem...) and I still have bras that
I've used for over 3 years, without the stretch being lost one bit from
doing this. It's ever so much more graceful to put on OR take off your bra
this way. No, I am NOT kidding. Go on, go rip off your clothes and try
it right now, even before you make your tube, you'll see. :^) No, really, go on... I won't laugh... I'll just sit here and check my email....
You're back already? And smiling? Now
you may ask, "Why has no one ever mentioned this to me before?" Not a
clue. It just seems to be such a foreign thing to people who haven't
done it, that even some bra fitters I've mentioned it to have just stared at me blankly for a moment. I could almost SEE their minds calculating their
bra band size and hip size and saying 'NO WAY!'.
If you SEW with
bra-band-type elastics you already know that some elastic will stretch twice it's
length or more, so think about it... add 50% to your bra band size since
only the back half of your bra band may stretch. (As an easy math example, if your bra band is
40", you'd add another 20" to that, which makes 60" that your bra band would reach when stretched to the fullest...
figure this out using your own measurements... is the number
you get smaller than your hip size? No, it's larger, right? Alright then! It generally works
out the same way, no matter how large or small you are. There ya go,
AHA!
Here's a little tip though...if you have any problem pulling up your bra (with or without the tube added) up over your hips, just put your undies on first,
before your bra. Seems obvious maybe...but I thought I'd mention it. Undies just help the bra band elastic glide
over your hips faster than over bare skin. Then, pull the undies down a bit and pull the lower edge of your
'bra-tube' down over your abdomen. The 'dull' side of the fabric will
grab on to your skin and stay there when you pull your undies back up
over the bottom of it. I've never had the bra-tube ride up, but then, I usually wear
slacks or jeans. If you wear a dress all day, bending and twisting to
reach for things, your mileage may vary.
There, wasn't that easier than you thought? :^)