
Making a mastectomy camisole is easier than you think, if you start with a slip from your closet!
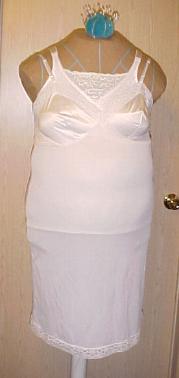
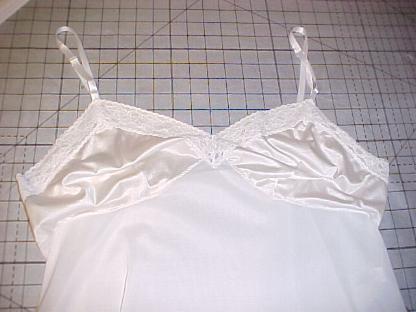
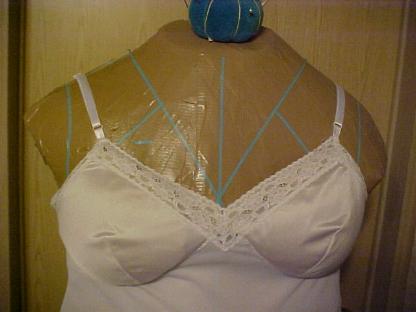
Here's the ordinary long slip, as it would be worn over a bra that holds foam 'leisure breast forms'. (The lacy center section showing is a part of the particular bra that is now part of a mannequin cover.)
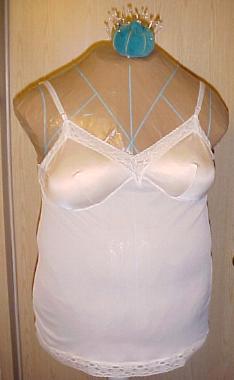
Here's the finished retrofitted slip, worn as a bra itself, with lightweight microbead breast forms pocketed inside. It's a lot more comfortable and neater looking than before. You'll enjoy having just one set of thin feminine straps on your shoulders, and it'll free you to wear a larger variety of necklines without wide bra straps showing. Any color slip will do fine.
**************************************************
It's especially noticeable after lifting heavy items, carrying groceries, or even just wearing the silicone forms all day. Sure, we get used to it, we SAY, but do we really? Think about it ladies, aren't you the least bit more grumpy by the end of an annoyingly 'tight' day in a regular bra with those forms squashed against your scar tissue? By the end of the day, I sometimes want to bite the head off anyone who gets in the way of my taking that painful bra off the moment I get home!
After mulling over this issue for some time, and noticing that it was somewhat better on the days when wearing the foam leisure forms instead, I started experimenting with various materials.
Loose wool was a good try, after getting a tip about wool-stuffed forms that some lady golfers use rather than wear a heavy silicone form all day. After all, wool is naturally antibacterial, wicks away moisture on a hot day, it dries quickly and feels cooler (which seems counter-intuitive) but it does have some drawbacks. It's very nature makes it begin to matte down after awhile, and it's harder to wash.
So... time and experimenting went on. Every time I'd hold one of those currently popular squishy neck pillows in my hand, I'd wonder...hmmmm... seems like that filling might work as a breast form. While discussing this with a good friend who is going through the same kind of pain as me, and finding she had actually bought microbead breast forms online that sounded as if they were stuffed with the same thing, I decided to give it a try.
She hadn't liked hers and had mailed them back before I could see them, but she described the covering design as the reason they'd not been comfy. My first few attempts were alright, but one thing or another didn't satisfy me about my own covering either. Then, after figuring that out, the amount of filling needed changing. Before I knew it though, it all clicked, and WORKED!
I tested them, my friend tested them, and after a couple months, we'd proved it works! More people tried them, always with good results. (Go HERE to learn to make your own microbead breast forms.)
That's how I came up with making this slip retrofit, mostly to wear the microbead bra forms in. After all, I'd thought for ages that if a really lightweight breast form could be made, and a slightly loose garment could be made out of the right satiny fabric, it would practically glide over scarred areas with no chance of adding to the pain, and be cooler to wear because the back of the breast forms wouldn't be crushed up against the chest wall, like in a bra..cooler for summer, as well as for the frequent hot flashes that we usually have after breast cancer treatments. This really works! Not perfect maybe, nothing ever will be PERFECT again, but then it never was before either, lol...
Now, I do still occasionally wear something else, but always come right back to this as being one of my favorite garments, so comfortable that I can go all day without thinking about the drawing, clawing, irritating pain that comes with a regular bra and silicone forms. Make yourself some microbead breast forms, and give this undergarment a try, you'll be SO hooked!
Yes, some of you may say you've seen something called a mastectomy camisole, looking a little similar on the outside, but I've tried some purchased pocketed mastectomy camisoles and found that they STILL are made with a 'bra band' basically on the inside, or a pocketed elastic 'shelf bra' that rides right back up into the scars.
Wore them once or twice, same pain as a bra, and left them in the closet. Truly, why don't they get REAL mastectomy survivors to design those things, sheesh..... Make this instead. You won't be sorry.
*************************
HERE'S HOW TO CONVERT YOUR STANDARD SLIP INTO A MASTECTOMY CAMISOLE:
You have some leeway here in slip sizes. I find that it’s sometimes better to use a slip one size smaller than your bra band size, so that the slip fits more snugly on your body and helps to hold your breast forms in place. It’ll still be much more loose than your bra, so you’ll barely notice you have it on.
Slips usually come in even numbers, same as bras. For example: If you wear a size 40 bra band, you can go down to a 38 without any problem, and OCCASIONALLY down to a 36, if the fabric is very stretchy.
Don’t try wearing this with a silicone form, the fabric won’t handle it, and it’s not really for weighted foam leisure forms either, but you can try those with some slips and it’ll work. Really though, once you make microbead breast forms, you’ll not want to wear the foam or silicone ones often anyway. :^)
Here's what you need:
- Slip
- Swimsuit fabric or similar with 4-way stretch, to make the mastectomy pocket
- Sheet of paper, typing paper will do fine
- Pins
First, we’ll make a pattern for the pocket that
holds the breast form. It’s simple and
fast to do, you’ll only need to gather a bunch of pins, a sheet of paper, and a
padded surface to pin into. An ironing
board works well, or a firm sofa pillow.
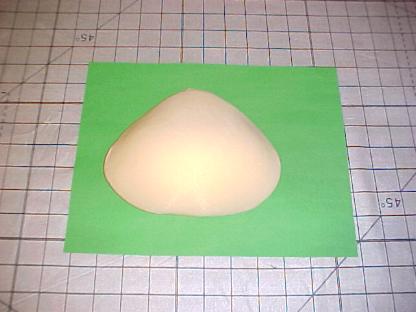
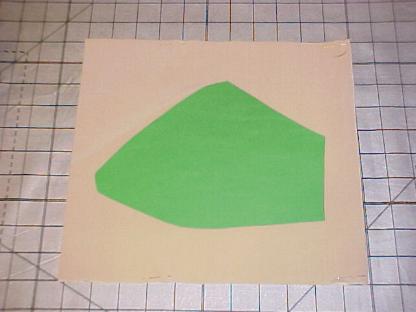
Lay the paper down on your padded surface, and
lay one foam or microbead breast form over it.
I’ve used a foam breast form in the first photo, because I had one
handy, and also because it’s just easier to pin over the firm foam rather than
the looser microbead form.
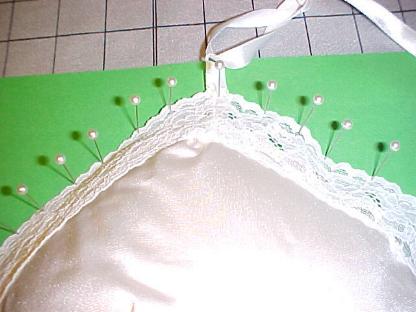
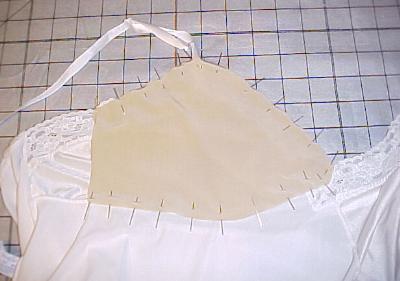
Lay the bra-cup portion of the slip over
it. Start pinning along the bottom seam
of the bra cup area, then go to the top of the cup where the strap attaches and
pin just barely into the upper edge of the lace. Smooth the fabric down with your fingers and continue to pin in a
line toward the center of the slip, then outwards toward the armpit area.
They weigh more than microbead forms, about five times the weight (at approximately 5 ounces instead of the 1 ounce microbead forms, though still slightly less than half the weight of a silicone form), but they are comfortable, look great, fill in the upper chest and the underarm areas better, and work just fine inside this slip/camisole retrofit because they are so nicely shaped to start with. Being heavier, you'll find that you need to adjust your shoulder straps and put a stitch through them to hold them in place so you'll not have to adjust sliding straps all day, but they do work great and I'd give them my personal recommendation for anyone looking for comfort in a purchased foam form, to wear inside this slip/cami.
However, they are expensive, costing about $200 for a pair of them. If your insurance doesn't cover it, the next best thing for comfort is the microbead forms, in my opinion. Plus, you could make MANY pairs of microbead forms for that price. I have some doubts that memory foam (with only about six months life expectancy) will last as well as microbeads during frequent summer wear and washing, regular foam doesn't, and they take longer to dry. I'll continue to wear my microbead designs 90% of the time because I prefer the weight (and the cleanliness of frequently washed forms), but I'd positively feel very comfortable wearing the "First Form" memory foam breast forms in this slip/cami retrofit, even under the dressiest of clothing, rather than suffer through the weight of my silicone forms in a tight bra all day.
By the way, I do not get any 'freebies' from breast form or garment manufacturers to test, these are just my own opinions from using the latest things I've chosen that my local mastectomy fitter recommended, and that my insurance would cover in my own circumstances. If any of you manufacturer's think you have something better and want it tested, (hint hint!) let me know. But be forewarned, I don't recommend anything that doesn't work.
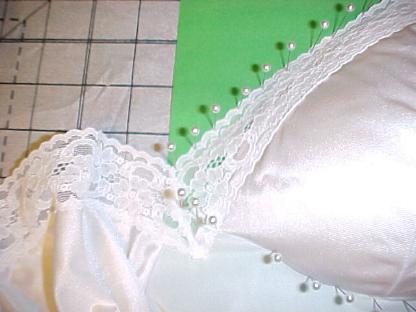
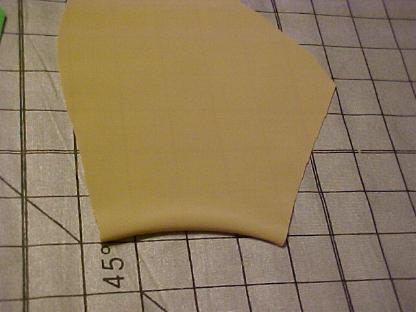
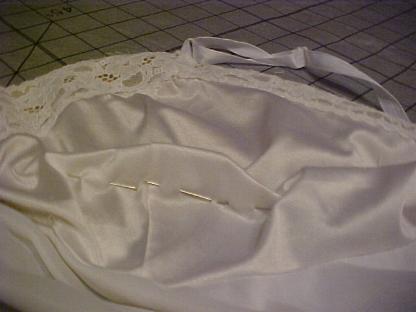
Once you’ve cleared the breast form, pin a
straight line from the upper edge to the bottom seam (near the armhole area). You will need to leave a large
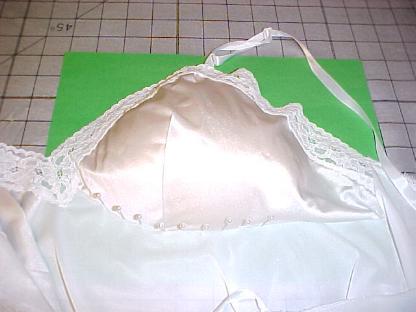
stretchy pocket opening on your pattern, so you can insert and remove your breast forms. You’ll note that there is some extra fabric
loose in that area, don’t try to smooth it out. The back pocket will stretch later as you’re wearing it and
eliminate the extra fabric.
You'll see what I mean in the photo below. Just pin over the wrinkles in your straight line, so your pocket pattern will have a straight edge.
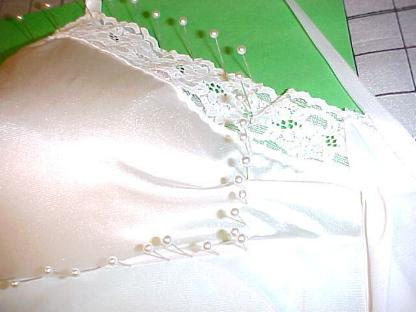
Add pins all around the edges until they’re about 1/4th to 1/2
an inch apart. When you’re finished, remove all of them, and remove the slip and
breast form. You’ll now have a clearly
defined dotted paper pattern to make the pocket, all lined out in small holes left by the
pins.
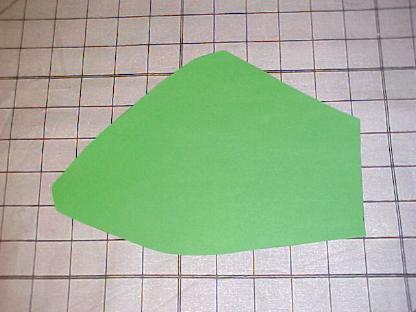
Connect the dots with a pen or pencil, making a solid line all around, smoothing out your lines when they are too uneven, and
cut out your paper pattern..
Take a piece of stretchy swimsuit fabric, shown below in the flesh color that I almost always use.
There’s a reason for that. I’m sure that by now you’ve noticed that if you
lean forward, your breast forms often pull your bra forward and people may
catch a glimpse BEHIND your breast forms from your neckline.
It’s handy to always make your pockets out of flesh color fabric so that
it’s much less noticeable.
After all, if
we used bright white fabric here to match the slip, it would reflect and make
the ‘lean forward’ issue much more obvious.
:^) On everything but black
slips, I generally use the flesh color swimsuit fabric. If you’re going to buy just one color of fabric,
it’s the color you’ll need more often.
Anyway, use a portion of fabric about 10” by 22” and fold it
in half. You won’t use it all, but
since you’ll probably have to buy a larger portion at the fabric store and cut
it up, I just chose that size as the largest you’ll likely need, no matter
your bra cup size.
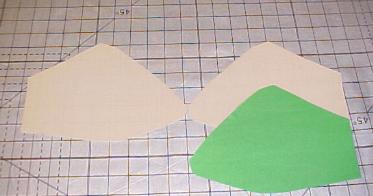
Cut it out through both layers of fabric, and
you’ll now have two reversed pocket pieces that go in the correct directions.
Go to the armpit end, that will be used for the
pocket opening, and stretch it. The
direction that the fabric rolls in on itself, will go to the inside of the bra
cup area. Don’t worry, it won’t ravel or run like some fabrics. Just leave the rolled-in edge and don’t worry about hemming it.
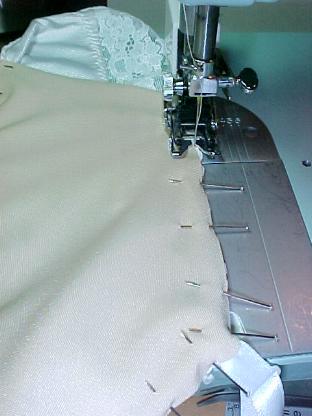
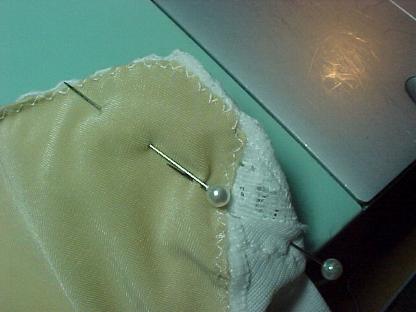
Pin one pocket into a bra cup area, pinning from
the outside in, so that you can remove the pins easily while sewing.
Be sure to pinch up the excess fabric on the slip bra-cup and pin it out of the way, so you won't accidentally sew through it in the next step.
Set your sewing machine at a medium width zig-zag stitch (on my sewing machine, it’s about a 3) and a length of about 8 or 9 stitches per inch. Starting at one armpit edge, zig-zag all the way around the bra cup.
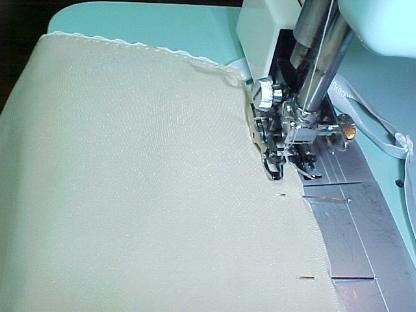
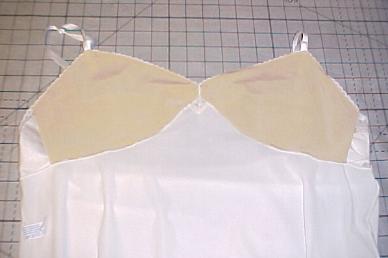
Sew in the other pocket the same way. Here is how it will now look on the inside:
Here's how it will look on the outside. The zig-zagged lines barely show at all.
Now the slip will need to be shortened. If you’re comfortable with it worn at
waistline level, go ahead and make it shorter than this. Personally, like mine to be long, because
I’ve fairly active. It’s comfortable to
wear the bottom of the camisole tucked inside the waistline of underwear and pant or skirt waistbands. This makes it even more secure-feeling when reaching, concerned
that without a bra band your breast forms may reach with you and end up
uneven. I’ve never noticed that
happening when left long and tucked in.
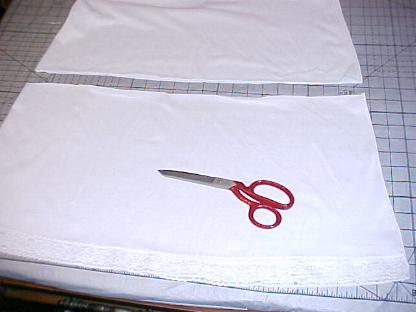
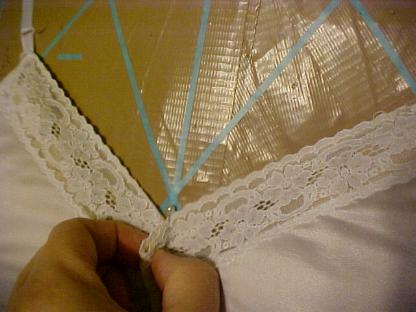
Now we'll move the hem lace up to your new length. It’s easiest to lay your scissors slightly
underneath the edge of the lace and snip it off all the way around, but you can
use a seam ripper if you’re patient. I’m not.
:^)
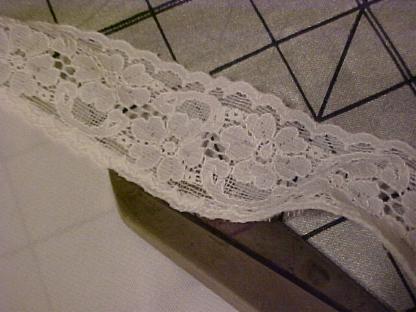
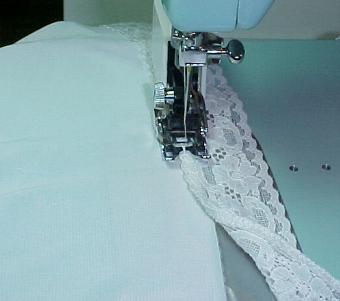
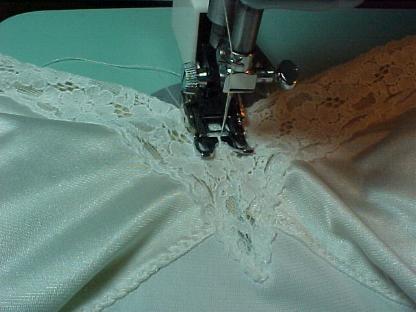
Using the same zig-zag stitch you used earlier to sew in
the pocket, stitch the lace onto the bottom of your camisole, overlapping it
about ¼” over the cut edge. You’ll probably have a little
left over because it’s smaller than the hem of the slip was, so just cut to measure, overlap
the ends of the lace about ¼ inch, then zig-zag down across both ends to secure
it.
You may have seen my ‘breast-free’ COPY YOURSELF mannequin
around this website before. In the
photos below, the microbead breast forms have been inserted into the pockets,
and the slip put onto the mannequin for a final fitting. When you try yours on yourself, you’ll
probably need to take up the straps quite a lot, as this is now worn as a long
bra and will need to ride higher at the bustline than before.
It’s at this point that you may notice some
‘gaposis’ at the upper edge of the bra-cup area.
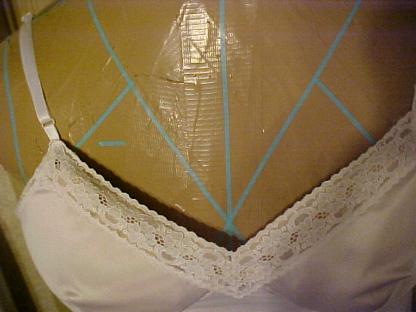
If so,
pinch the lace or fabric up at the center front until the gap is gone, and pin... notice how the gap dissappears?
Take the slip/camisole back to the sewing
machine and measure how much you took it up. In this case, it was about 5/8ths of an inch.

Take out your pin and pinch the same amount on
the inside now and pin it again, in the same way you had it pinned on the outside.
You’ll stitch down a small dart that will look
like a triangle, with the widest part at the upper edge, going down to nothing
down below. After stitching it, cut
away the little triangle. Zig-zagging from the outside, go over the seam to
flatten it down and secure it further.
Here’s how it will now look on the mannequin,
see how much better it fits at the top?

You're all done! One thing I might mention...some slips have that funny little dart on the bust area that leaves the point showing even after being stuffed with your microbead form. It usually goes away when it's on your own flexible body, but shows up on the stiff surface of a mannequin. Some slips have different darts that look better, but this is the only one I had handy to make the sample with while making these photos.
One final tip that might make your sewing projects easier: You may have wondered why there's a small blue line on the mannequin over to the left of the photo above. That's where my 'chemo port scar' is located on ME! When designing clothing, I like to keep collars and neckline edges above it.
That's why you also see the blue v-shaped neckline marks near it. If you use a mannequin, try marking out your own trouble spots on it with bits of artist's graphic design tape or something similar. It'll prevent you from doing a lot of sewing on a garment that you'll have to throw away later because it shows too much of your own medical history! :^)