HOW TO USE ADJUSTMENT TUBES TO CUSTOMIZE YOUR MICROBEAD BREAST FORMS
For those of you who have bilateral mastectomy, the usual microbead breast forms may fit just fine the first time you get oa pair, but for those of you with special circumstances such as unilateral (single side) mastectomy, or those with a lumpectomy or who have had reconstruction fail, or those who are used to a more relaxed bustline because of age, for any other reason where the standard filled microbead form may not fit the first pair you buy, the ADJUSTMENT TUBE is an easy answer to a complicated fitting problem! All you have to do is to ask for it when you order your microbead forms, and I'll cut your pair out and sew them with a very long filling tube left on. It will now become your ADJUSTMENT TUBE.
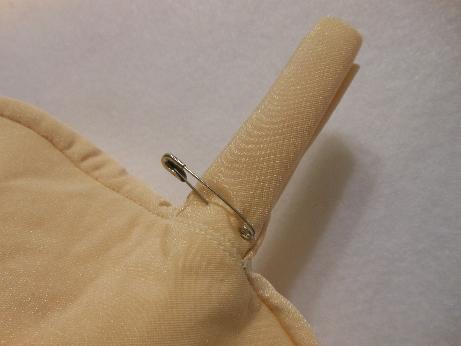
When you receive your pair of microbead forms, the tubes will be folded down and secured with small safety pins. Your job will be to try them on to see if any microbeads need to be removed, then use the easy directions below to permanently close the tube when your forms are fitting just the way you need for them to. It only requires a needle and thread, a pair of scissors, and a few minutes. It's also good to have a mixing bowl handy to catch spills, and a vacuum in case you're REALLY messy. Wouldn't hurt to have a dryer sheet to rub over your hands and the bowl, so the little microbeads don't fly off and stick to them so much. :^)
Let's get started! You're about to have a pair of totally CUSTOM FITTED microbead breast forms that will fill your bra exactly right for you. After this first pair is done, write down how many microbeads you removed from each form and tell me the next time you order a pair. From then on, I'll fill them with exactly the amount you need and sew them closed here, so you won't have to do it again on future forms.
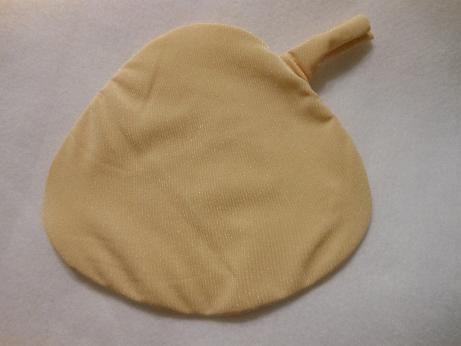
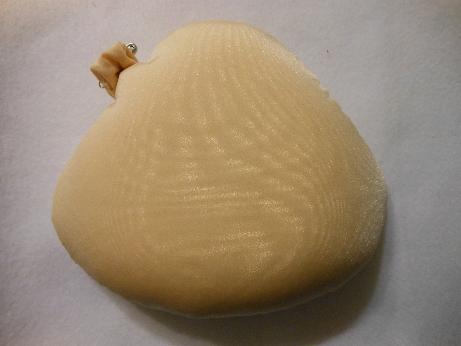
Below, you'll see a picture of what your new breastform looks like before I fill it with microbeads. See the long thing that looks a little like a finger poking away from the seam? That's your ADJUSTMENT TUBE.
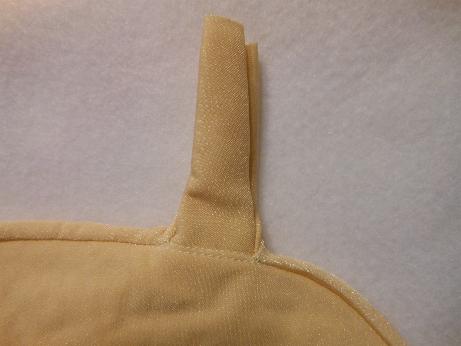
Below is a close-up of how it looks. Simple, right? I construct it in such a way that makes it more difficult for the messy microbeads to spill out before you want them to. Takes a bit longer, but is way easier than having microbeads fly out all over the place. You're welcome. ;^)
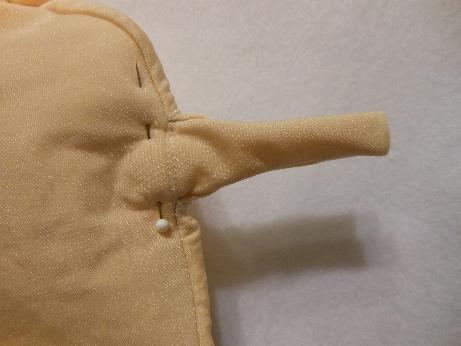
It's helpful for you to see how it's constructed, in case someone views this to learn how to add an adjustment tube to their own forms they're sewing, so I'm showing you just a bit more. Once I've stuffed the microbead form, I pin it closed back before the beginning of the tube.
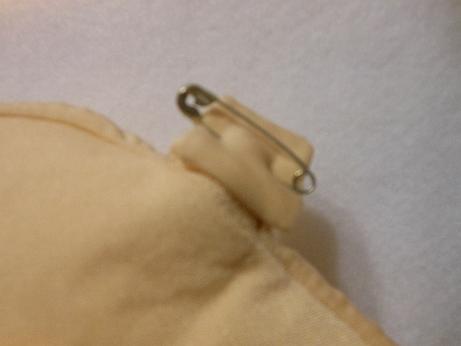
Then, I fold the tube down a couple times and safety pin it closed for it's trip to your house, and remove the straight pin.
See? It doesn't take up much room. You could actually wear it this way, but you really only want to try it on this way, to see if you need to remove any microbeads.
You can squeeze out any microbeads you need to, over a mixing bowl to catch them. It's best to only remove a tablespoon full at a time, particularly with the smaller sizes, as it makes a big difference. With the larger sizes, Medium and above, you may want to remove up to 1/8th cup at a time. If you remove too many, you can put some back in with a funnel poked down the tube and push them inside with the eraser end of a pencil...but it's just way easier to only take out what you need to, a little at a time, then roll the tube back down and pin it shut, removing a little more later if needed.
When you're all through adjusting to make your forms fit just perfectly, it's time to sew it closed permanently. (**Note: for those of you who are undergoing reconstruction with expanders stretching the area first, and need smaller and smaller adjustable forms to use along with the expanders, just leave the tube on and keep it pinned with a safety pin, OR to be safer, lightly hand stitch it closed with big stitches so you can pull them out and remove more microbeads as your expanders get bigger.)
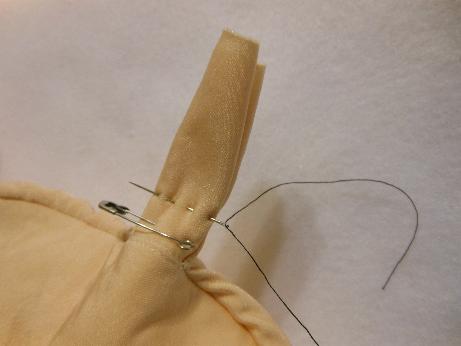
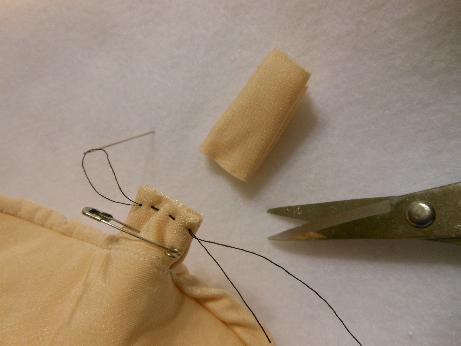
Now, let's see, where was I...OH yes, we're closing the adjustment tube permanently! First, pin it closed like you see in the photo below.
Now we're having fun! You actually get to sew a tiny seam, maybe four or five stitches, yippeee!
There you go, you did it! :^) Don't pull the needle out too far, you only need to hold it closed temporarily. And yes, for you purists, I did use a dark thread instead of one to match, but you want to be able to see it in the photos, right? Besides, it really doesn't have to be matching thread for this. ;^) You'll soon see.
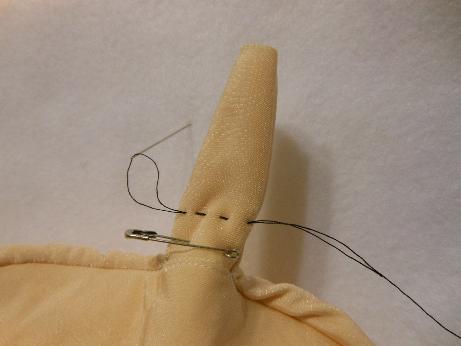
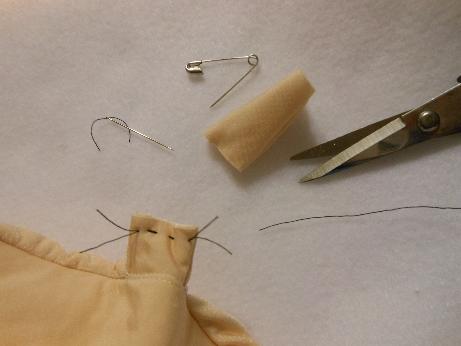
More excitement! You get to snip off the excess adjustment tube. One snip, done. Difficult, right? Yeah, I didn't think so either.
Now, snip the threads off on either side of the tube, leaving little tails. Also, remove the safety pin, you won't need it anymore.
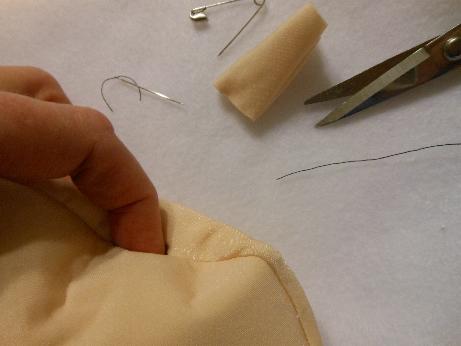
This is fun, just poke the little last bit of the tube down inside the seamline, just using the tip of your finger.
Awwwwww...isn't that cute? Looks like a little belly button! :^)
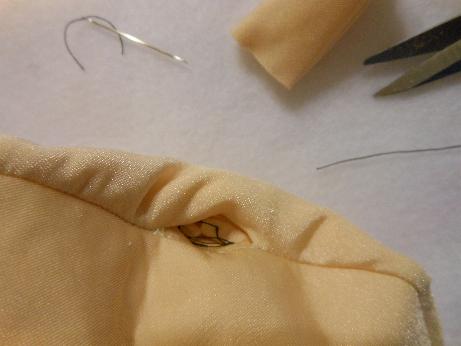
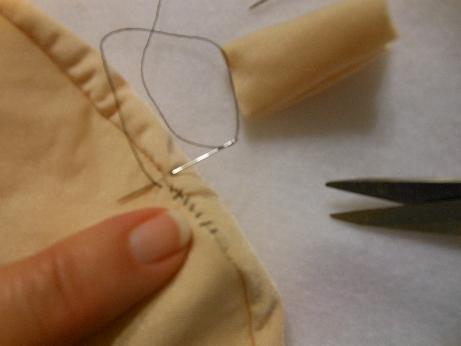
Here's the part everyone thinks will be hard, but oh no, easy-peasy! Just thread your needle, knot the end, and start stitching with small stiches from one end of the opening to the other. Took maybe 8 little stitches here, and as you can see, they don't have to be fancy, just do like the needle in the picture, going in at one side and out at the other side, over and over.
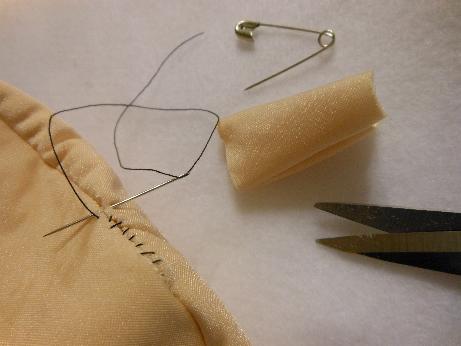
When you reach the end, pull the thread snug and all those little stitch lines start to draw up and sort of dissappear into the fabric of the seam. See? It's starting here below, just keep pulling gently until they look tightly closed. Take a few more stitches in one area, to lock down the thread so it won't pull out, then run the needle into the fabric one more time, letting it come out maybe a half inch away, and snip off the thread. The end will fall back behind the fabric as soon as it's stretched, so it hides the excess thread.
You're DONE! Well, with this one anyway. Measure how much you had to take out of this one, and go take the same amount from the other microbead breast form if you want them exactly the same, and sew it closed the same. Takes what, maybe five minutes? :^) OR, if you need two forms with slightly different amounts of filling because you have more tissue left on one side than the other, just go take some out and try it on, etc... just like you started with on this form.
Wasn't that easy? It's the simplest way I could come up with, to make a totally adjustable breast form, and still make it simple to close for even those who are 'sewing challenged'. If you can get thread through the eye of a needle, you can do this, so give it a try. :^) After you've adjusted your first set of forms, you have only to tell me how much to take out from the standard form in your size, and I'll make them exactly to fit you from then on and will close them up with my fancy schmancy little seams that I do. They're slightly different from these because I'm just nuts about it must look good under magnification, lol... as if someone's going to follow you around with a magnifying glass, lol... but really, they do exactly what you've done here, closed the forms to keep the microbeads inside.
Ta-daaaaaa! Aren't you proud of yourself? Told you it was easy. Now, go wear your new lightweight microbead forms, and enjoy having a day without pain from the silicone ones. If I ever find a good use for a silicone prosthesis, I'll let you know. ;^D